

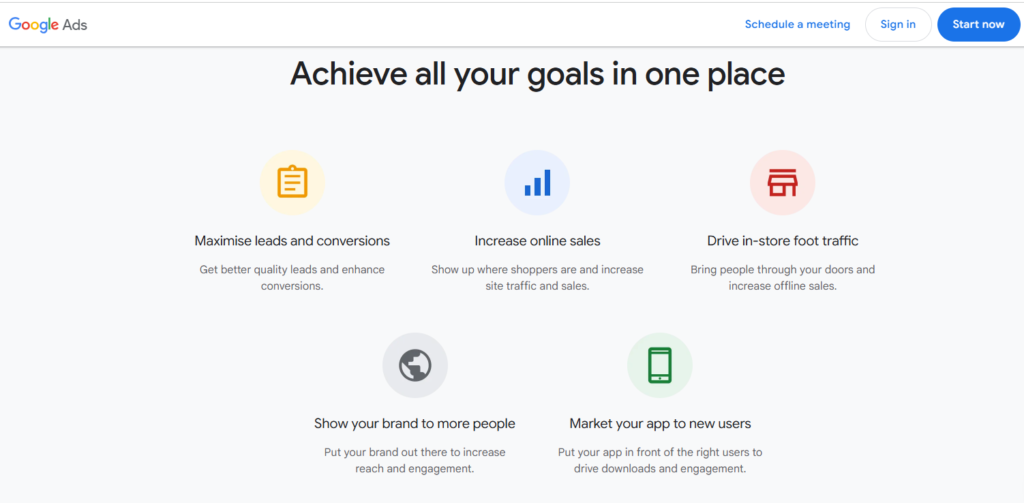
Creating a Google Ads Manager account is the first step toward harnessing the power of digital marketing for your business. This platform provides you with a centralized way to manage your ad campaigns, making it easier to optimize and analyze your performance. In this tutorial, we will walk you through the process of setting up your Google Ads Manager account, navigating its features, and tips for creating effective campaigns that convert.
What is Google Ads Manager?
Google Ads Manager, also known as Google Ads Manager Account (sometimes referred to as a Google Ad Account), is a tool for businesses and agencies that allows for the management of multiple Google Ads accounts in a single location. This feature is particularly useful for those running several ad campaigns across different clients or business departments.

Step-by-Step Guide to Setting Up Your Google Ads Manager Account
Step 1: Create a Google Account
Before creating a Google Ads Manager account, ensure that you have an active Google account. If you don’t have one, follow these steps:
- Go to Google Account Creation Page: Visit accounts.google.com/signup.
- Fill in the Required Details: Enter your first and last name, desired email address, and password.
- Complete Profile Information: Follow the prompts to fill in additional information like your phone number and recovery email.
- Agree to Terms and Conditions: Review and accept Google’s terms of service and privacy policy.
- Verify Your Email: Follow the instructions sent to your confirmation email.
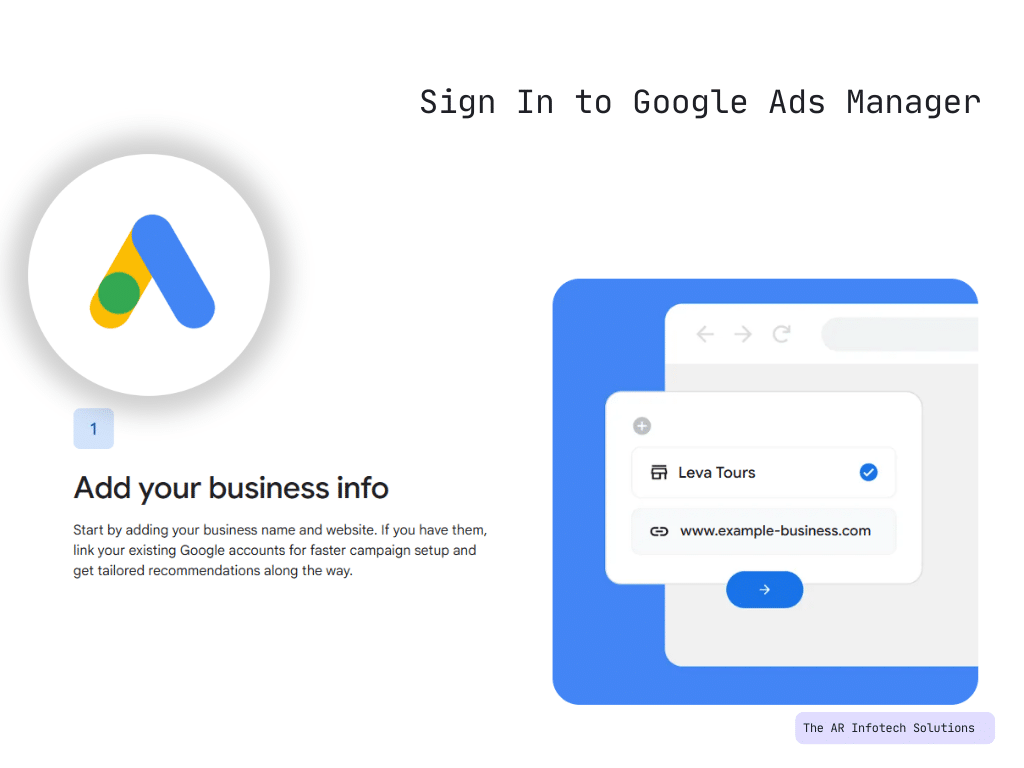
Step 2: Sign In to Google Ads Manager
Once you have your Google account set up:
- Visit the Google Ads Manager Page: Go to ads.google.com.
- Click on “Start Now”: You’ll find this option prominently displayed on the homepage.
- Sign In: Enter your Google account credentials to sign in.
Step 3: Create Your Google Ads Manager Account
Once signed in, you can create your Google Ads Manager account:
- Choose “Create Account”: After signing in, you may be prompted to create your manager account or link it with existing ad accounts.
- Provide Account Information: Fill in the necessary details, including:
- Account Name: This should reflect your business name or the primary use of the account.
- Billing Country: Select the country where you operate your business.
- Time Zone: Choose your time zone — this affects reporting and scheduling for your ads.
- Currency: Select the currency that you wish to use for transactions.
- Choose Account Type: Decide if you want your new account to serve different clients or to focus solely on your own advertising.
- Click “Submit”: After filling in all the necessary information, click “Submit” to create your account.
Step 4: Add Existing Accounts (Optional)
If you have existing Google Ads accounts that you wish to manage within this new Manager account:
- Go to “Account Linking”: From your Google Ads Manager dashboard, find the option for “Account” and select “Account Linking.”
- Add Existing Accounts: Enter the customer ID of the accounts you want to link. You can find this number on the top right corner of the Google Ads account dashboard.
- Send the Request: Click on “Send Request.” The account owner will need to accept this request to complete the linking process.
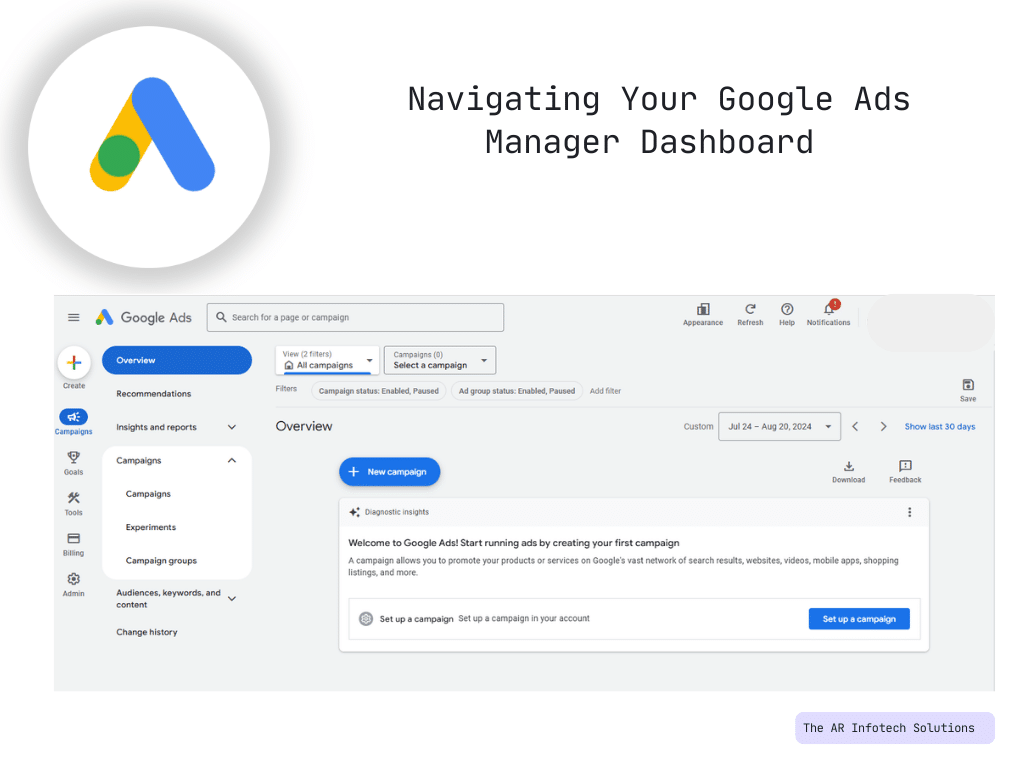
Step 5: Navigating Your Google Ads Manager Dashboard
Once your Google Ads Manager account is set up, it’s time to familiarize yourself with the dashboard:
- Overview Page: The first thing you’ll see is the overview or dashboard page, which provides a summary of account performance.
- Account Menu: On the left-hand side menu, you’ll find options for different functionalities:
- Campaigns: View and create campaigns.
- Ad groups: Manage ad groups within campaigns.
- Ads & extensions: Create and optimize your ads and extensions.
- Tools & settings: Access various tools for keyword planning, conversions tracking, and billing.
- Performance Reports: Monitor metrics such as clicks, impressions, conversions, and cost to evaluate ad performance.
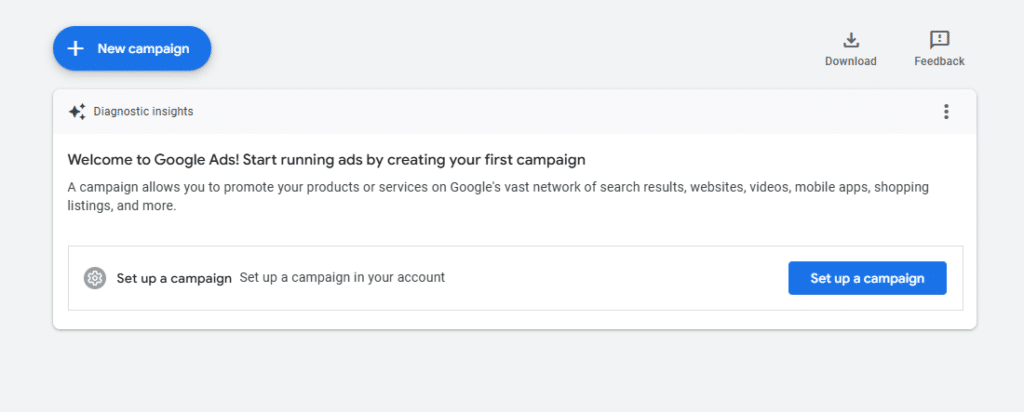
Step 6: Setting Up Your First Campaign
After familiarizing yourself with the dashboard, it’s time to create your first campaign. Here’s how:
- Click on “Campaigns” from Menu: In your dashboard, click on “Campaigns” in the left-hand menu.
- Select the Plus (+) Button: Click on the “+” button to create a new campaign.
- Choose Your Campaign Objective: Google Ads offers several campaign objectives, including Sales, Leads, Website Traffic, and more. Choose one that aligns with your business goals.
- Select Campaign Type: Choose between Search, Display, Video, Shopping, or App. For beginners, Search campaigns are often recommended.
- Set Campaign Parameters:
- Campaign Name: Create a name that reflects the campaign purpose.
- Network Settings: Decide if you want your ads to appear only on Google search results or also on partner sites.
- Targeting and Audiences: Define your audience based on demographics, location, and other targeting options.
- Budget and Bidding: Set your daily budget and choose a bidding strategy. You can select manual bidding to control costs or automated bidding to let Google optimize for you.
- Ad Extensions: Use ad extensions to provide additional information, such as site links, location, and call buttons. These can enhance the visibility and performance of your ads.
- Create Your Ads: Write compelling ad copy that includes headlines, descriptions, and display URLs. Ensure that your ads are relevant to the keywords you’ll target.
- Review and Launch: Once you’ve filled in all necessary fields, review your campaign settings carefully and click “Publish” to launch your campaign.
Tips for Creating Campaigns That Convert
- Target Relevant Keywords: Conduct thorough keyword research to find terms that potential customers are typing into Google. Use the Google Keyword Planner for assistance.
- Craft Compelling Ad Copy: Write engaging and concise ad copy that clearly communicates the value proposition and includes a strong call-to-action (CTA).
- Segment Your Campaigns: Create separate campaigns for different product lines or services to tailor messaging and targeting more effectively.
- Utilize A/B Testing: Test different versions of your ads to see which performs best. Adjust your strategies based on real data.
- Monitor Performance Regularly: Use the performance data available in your dashboard to measure success and make data-driven adjustments.
Conclusion
Setting up your Google Ads Manager account is a crucial first step in launching effective digital advertising campaigns. By following this step-by-step tutorial, you can create an organized and efficient advertising structure that allows you to manage multiple accounts seamlessly. Remember that the key to successful ads lies in meticulous planning, execution, and continuous performance optimization. Using the insights and tools provided by Google Ads Manager, you’ll be well-equipped to drive traffic, generate leads, and grow your business online.
Disclaimer: The information provided in this guide is for educational and informational purposes only. While we strive to ensure accuracy, we do not guarantee the completeness or reliability of the content. Google Ads policies, features, and interfaces may change over time, and we recommend referring to Google Ads Help for the most up-to-date guidelines. The use of Google Ads should comply with Google’s policies and applicable laws. We are not affiliated with or endorsed by Google. Use this guide at your own discretion.